Bun is complete toolkit for building and testing full-stack JavaScript and TypeScript applications. If you’re new to Bun, you can learn more from the Bun 1.0 blog post.
Bun 1.2 is a huge update, and we’re excited to share it with you.
Here’s the tl;dr of what changed in Bun 1.2:
- There’s a major update on Bun’s progress towards Node.js compatibility
- Bun now has a built-in S3 object storage API:
Bun.s3 - Bun now has a built-in Postgres client:
Bun.sql(with MySQL coming soon) bun installnow uses a text-based lockfile:bun.lock
We also made Express 3x faster in Bun.
Bun is designed as a drop-in replacement for Node.js.
In Bun 1.2, we started to run the Node.js test suite for every change we make to Bun. Since then, we’ve fixed thousands of bugs and the following Node.js modules now pass over 90% of their tests with Bun.
Here’s how we did it.
How do you measure compatibility?
In Bun 1.2, we changed how we test and improve Bun’s compatibility with Node.js. Previously, we prioritized and fixed Node.js bugs as they were reported, usually from GitHub issues where someone tried to use an npm package that didn’t work in Bun.
While this fixed actual bugs real users ran into, it was too much of a “wack-a-mole” approach. It discouraged doing the large refactors necessary for us to have a shot at 100% Node.js compatibility.
That’s when we thought: what if we just run the Node.js test suite?
Running Node.js tests in Bun
Node.js has thousands of test files in its repository, with most of them in the test/parallel directory. While it might seem simple enough to “just run” their tests, it’s more involved than you might think.
Internal APIs
For example, many tests rely on the internal implementation details of Node.js. In the following test, getnameinfo is stubbed to always error, to test the error handling of dns.lookupService().
test/parallel/test-dns-lookupService.js
const { internalBinding } = require("internal/test/binding");
const cares = internalBinding("cares_wrap");
const { UV_ENOENT } = internalBinding("uv");

cares.getnameinfo = () => UV_ENOENT;
To run this test in Bun, we had to replace the internal bindings with our own stubs.
test/parallel/test-dns-lookupService.js
Bun.dns.lookupService = (addr, port) => {
  const error = new Error(`getnameinfo ENOENT ${addr}`);
  error.code = "ENOENT";
  error.syscall = "getnameinfo";
  throw error;
};
Error messages
There are also Node.js tests that check the exact string of error messages. And while Node.js usually doesn’t change error messages, they don’t guarantee it won’t change between releases.
const common = require("../common");
const assert = require("assert");
const cp = require("child_process");

assert.throws(
  () => {
    cp.spawnSync(process.execPath, [__filename, "child"], { argv0: [] });
  },
  {
    code: "ERR_INVALID_ARG_TYPE",
    name: "TypeError",
    message:
      'The "options.argv0" property must be of type string.' +
      common.invalidArgTypeHelper([]),
  },
);
To work around this, we had to change the assertion logic in some tests to check the name and code, instead of the message. This is also the standard practice for checking error types in Node.js.
{
  code: "ERR_INVALID_ARG_TYPE",
  name: "TypeError",
   message:
     'The "options.argv0" property must be of type string.' +
     common.invalidArgTypeHelper([]),
},
While we do try to match the error messages of Node.js as much as possible, there are times where we want to provide a more helpful error message, as long as the name and code are the same.
Progress so far
We’ve ported thousands of files from the Node.js test suite to Bun. That means for every commit we make to Bun, we run the Node.js test suite to ensure compatibility.
Every day, we are adding more and more passing Node.js tests to Bun, and we’re excited to share more progress on Node.js compatibility very soon.
In addition to fixing existing Node.js APIs, we’ve also added support for the following Node.js modules.
node:http2 server
You can now use node:http2 to create HTTP/2 servers. HTTP/2 is also necessary for gRPC servers, which are also now supported in Bun. Previously, there was only support for the HTTP/2 client.
import { createSecureServer } from "node:http2";
import { readFileSync } from "node:fs";

const server = createSecureServer({
  key: readFileSync("key.pem"),
  cert: readFileSync("cert.pem"),
});

server.on("stream", (stream, headers) => {
  stream.respond({
    ":status": 200,
    "content-type": "text/html; charset=utf-8",
  });
  stream.end("");
});

server.listen(3000);
In Bun 1.2, the HTTP/2 server is 2x faster than in Node.js. When we support new APIs to Bun, we spend a lot of time tuning performance to ensure that it not only works, but it’s also faster.
node:dgram
You can now bind and connect to UDP sockets using node:dgram. UDP is a low-level unreliable messaging protocol, often used by telemetry providers and game engines.
import { createSocket } from "node:dgram";

const server = createSocket("udp4");
const client = createSocket("udp4");

server.on("listening", () => {
  const { port, address } = server.address();
  for (let i = 0; i < 10; i++) {
    client.send(`data ${i}`, port, address);
  }
  server.unref();
});

server.on("message", (data, { address, port }) => {
  console.log(`Received: data=${data} source=${address}:${port}`);
  client.unref();
});

server.bind();
This allows packages like DataDog’s dd-trace and @clickhouse/client to work in Bun 1.2.
node:cluster
You can use node:cluster to spawn multiple instances of Bun. This is often used to enable higher throughput by running tasks across multiple CPU cores.
Here’s an example of how you can create a multi-threaded HTTP server using cluster:
- The primary worker spawns
nchild workers (usually equal to the number of CPU cores) - Each child worker listens on the same port (using
reusePort) - Incoming HTTP requests are load balanced across the child workers
import cluster from "node:cluster";
import { createServer } from "node:http";
import { cpus } from "node:os";

if (cluster.isPrimary) {
  console.log(`Primary ${process.pid} is running`);

  // Start N workers for the number of CPUs
  for (let i = 0; i < cpus().length; i++) {
    cluster.fork();
  }

  cluster.on("exit", (worker, code, signal) => {
    console.log(`Worker ${worker.process.pid} exited`);
  });
} else {
  // Incoming requests are handled by the pool of workers
  // instead of the primary worker.
  createServer((req, res) => {
    res.writeHead(200);
    res.end(`Hello from worker ${process.pid}`);
  }).listen(3000);

  console.log(`Worker ${process.pid} started`);
}
Note that reusePort is only effective on Linux. On Windows and macOS, the operating system does not load balance HTTP connections as one would expect.
node:zlib
In Bun 1.2, we rewrote the entire node:zlib module from JavaScript to native code. This not only fixed a bunch of bugs, but it made it 2x faster than Bun 1.1.
We also added support for Brotli in node:zlib, which was missing in Bun 1.1.
import { brotliCompressSync, brotliDecompressSync } from "node:zlib";

const compressed = brotliCompressSync("Hello, world!");
compressed.toString("hex"); // "0b068048656c6c6f2c20776f726c642103"

const decompressed = brotliDecompressSync(compressed);
decompressed.toString("utf8"); // "Hello, world!"
C++ addons using V8 APIs
If you want to use C++ addons alongside your JavaScript code, the easiest way is to use N-API.
However, before N-API existed, some packages used the internal V8 C++ APIs in Node.js. What makes this complicated is that Node.js and Bun use different JavaScript engines: Node.js uses V8 (used by Chrome), and Bun uses JavaScriptCore (used by Safari).
Previously, npm packages like cpu-features, which rely on these V8 APIs, would not work in Bun.
require("cpu-features")();
dyld[94465]: missing symbol called
fish: Job 1, 'bun index.ts' terminated by signal SIGABRT (Abort)
To fix this, we undertook the unprecedented engineering effort of implementing V8’s public C++ API in JavaScriptCore, so these packages can “just work” in Bun. It’s so complicated and nerdy to explain, we wrote a 3-part blog series on how we supported the V8 APIs… without using V8.
In Bun 1.2, packages like cpu-features can be imported and just work.
$ bun index.ts
{
  arch: "aarch64",
  flags: {
    fp: true,
    asimd: true,
    // ...
  },
}
The V8 C++ APIs are very complicated to support, so most packages will still have missing features. We’re continuing to improve support, so packages like node-canvas@v2 and node-sqlite3 can work in the future.
node:v8
In addition to the V8 C++ APIs, we’ve also added support for heap snapshots using node:v8.
import { writeHeapSnapshot } from "node:v8";

// Writes a heap snapshot to the current working directory in the form:
// `Heap-{date}-{pid}.heapsnapshot`
writeHeapSnapshot();
In Bun 1.2, you can use getHeapSnapshot and writeHeapSnapshot to read and write V8 heap snapshots. This allows you to use Chrome DevTools to inspect the heap of Bun.
Express is 3x faster
While compatibility is important for fixing bugs, it also helps us fix performance issues in Bun.
In Bun 1.2, the popular express framework can serve HTTP requests up to 3x faster than in Node.js. This was made possible by improving compatibility with node:http, and optimizing Bun’s HTTP server.
Bun aims to be a cloud-first JavaScript runtime. That means supporting all the tools and services you need to run a production application in the cloud.
Modern applications store files in object storage, instead of the local POSIX file system. When end-users upload a file attachment to a website, it’s not being stored on the server’s local disk, it’s being stored in a S3 bucket. Decoupling storage from compute prevents an entire class of reliability issues: low disk space, high p95 response times from busy I/O, and security issues with shared file storage.
S3 is the defacto-standard for object storage in the cloud. The S3 APIs are implemented by a variety of cloud services, including Amazon S3, Google Cloud Storage, Cloudflare R2, and dozens more.
That’s why Bun 1.2 adds built-in support for S3. You can read, write, and delete files from an S3 bucket using APIs that are compatible with Web standards like Blob.
Reading files from S3
You can use the new Bun.s3 API to access the default S3Client. The client provides a file() method that returns a lazy-reference to an S3 file, which is the same API as Bun’s File.
import { s3 } from "bun";

const file = s3.file("folder/my-file.txt");
// file instanceof Blob

const content = await file.text();
// or:
//   file.json()
//   file.arrayBuffer()
//   file.stream()
5x faster than Node.js
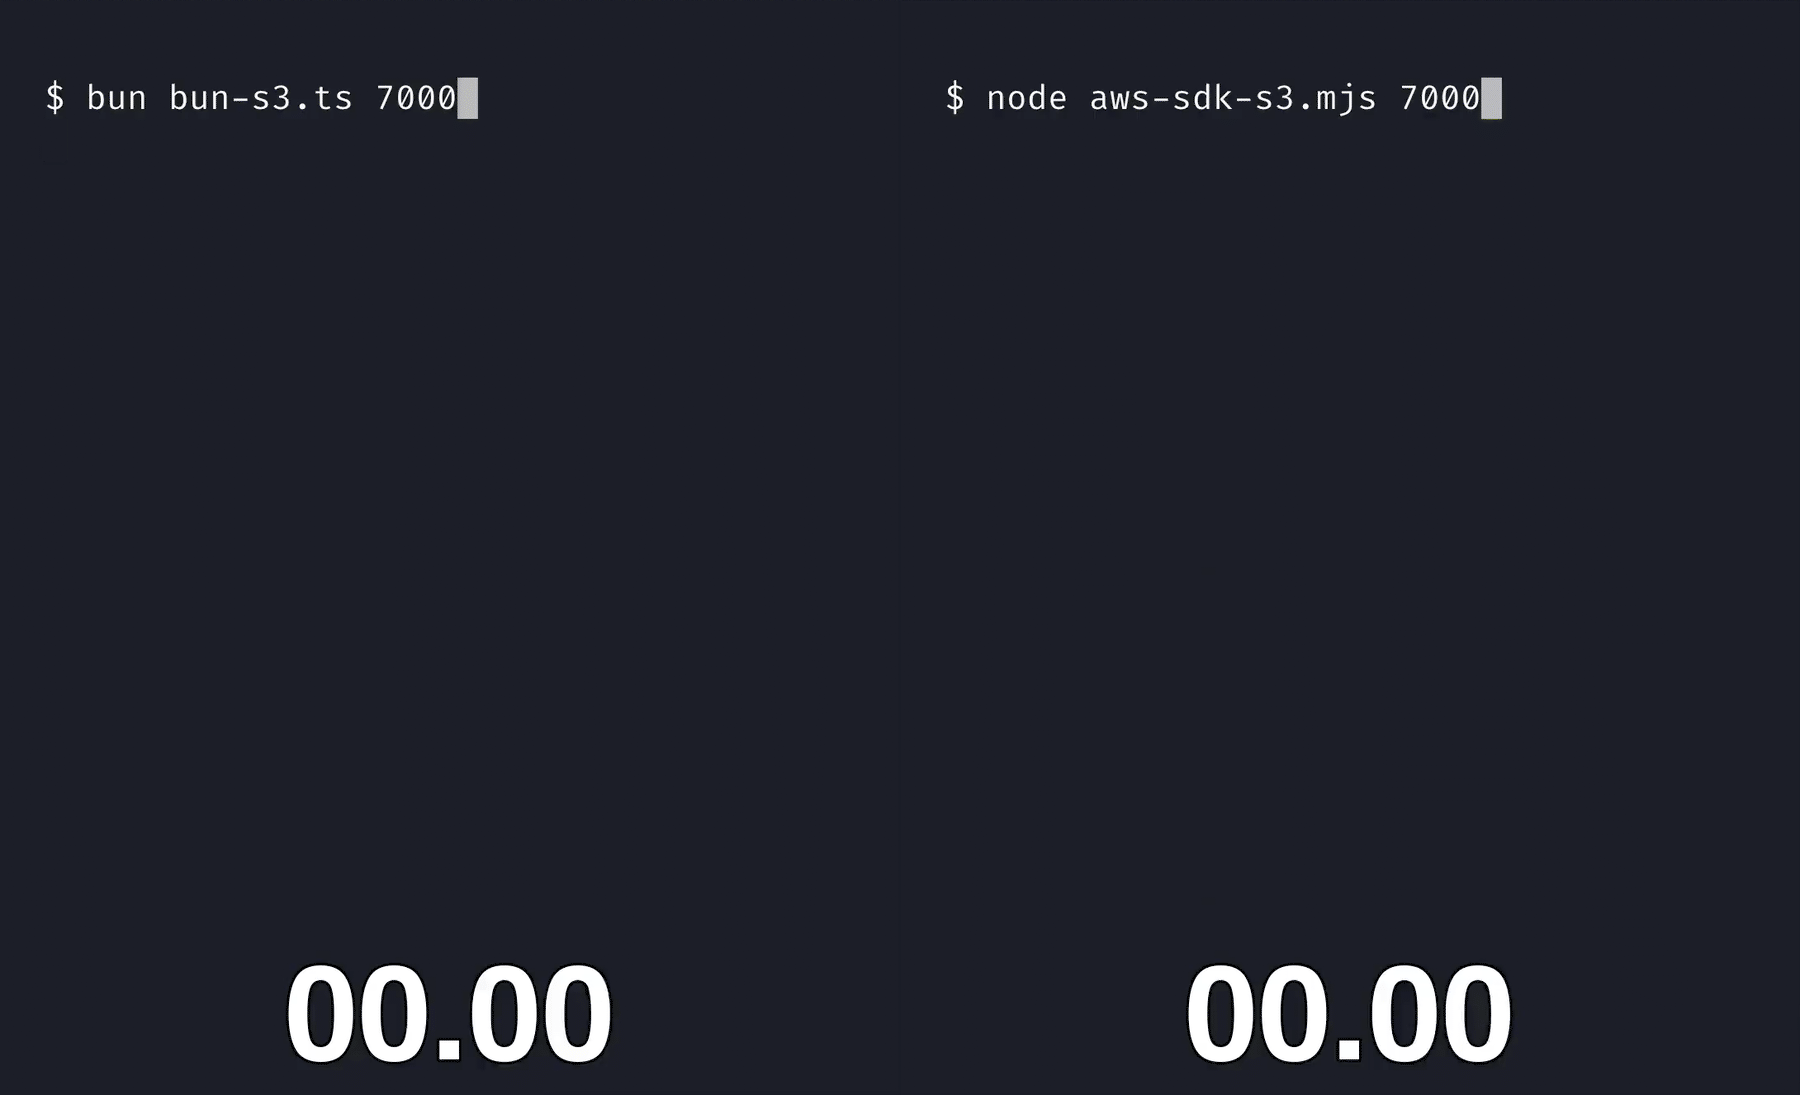
Bun’s S3 client is written in native code, instead of JavaScript. When you compare it to using packages like @aws-sdk/client-s3 with Node.js, it’s 5x faster at downloading files from a S3 bucket.
Writing files to S3
You can use the write() method to upload a file to S3. It’s that simple:
import { s3 } from "bun";

const file = s3.file("folder/my-file.txt");

await file.write("hello s3!");
// or:
//   file.write(new Uint8Array([1, 2, 3]));
//   file.write(new Blob(["hello s3!"]));
//   file.write(new Response("hello s3!"));
For larger files, you can use the writer() method to obtain a file writer that does a multi-part upload, so you don’t have to worry about the details.
import { s3 } from "bun";

const file = s3.file("folder/my-file.txt");
const writer = file.writer();

for (let i = 0; i < 1000; i++) {
  writer.write(String(i).repeat(1024));
}

await writer.end();
Presigned URLs
When your production service needs to let users upload files to your server, it’s often more reliable for the user to upload directly to S3 instead of your server acting as an intermediary.
To make this work, you use the presign() method to generate a presigned URL for a file. This generates a URL with a signature that allows a user to securely upload that specific file to S3, without exposing your credentials or granting them unnecessary access to your bucket.
import { s3 } from "bun";

const url = s3.presign("folder/my-file.txt", {
  expiresIn: 3600, // 1 hour
  acl: "public-read",
});
Using Bun.serve()
Since Bun’s S3 APIs extend the File API, you can use Bun.serve() to serve S3 files over HTTP.
import { serve, s3 } from "bun";

serve({
  port: 3000,
  async fetch(request) {
    const { url } = request;
    const { pathname } = new URL(url);
    // ...
    if (pathname === "/favicon.ico") {
      const file = s3.file("assets/favicon.ico");
      return new Response(file);
    }
    // ...
  },
});
When you use new Response(s3.file(...)), instead of downloading the S3 file to your server and sending it back to the user, Bun redirects the user to the presigned URL for the S3 file.
Response (0 KB) {
  status: 302,
  headers: Headers {
    "location": "https://s3.amazonaws.com/my-bucket/assets/favicon.ico?...",
  },
  redirected: true,
}
This saves you memory, time, and the bandwidth cost of downloading the file to your server.
Using Bun.file()
If you want to access S3 files using the same code as the local file-system, you can reference them using the s3:// URL protocol. It’s the same concept as using file:// to reference local files.
import { file } from "bun";

async function createFile(url, content) {
  const fileObject = file(url);
  if (await fileObject.exists()) {
    return;
  }
  await fileObject.write(content);
}

await createFile("s3://folder/my-file.txt", "hello s3!");
await createFile("file://folder/my-file.txt", "hello posix!");
Using fetch()
You can even use fetch() to read, write, and delete files from S3.
// Upload to S3
await fetch("s3://folder/my-file.txt", {
  method: "PUT",
  body: "hello s3!",
});

// Download from S3
const response = await fetch("s3://folder/my-file.txt");
const content = await response.text(); // "hello s3!"

// Delete from S3
await fetch("s3://folder/my-file.txt", {
  method: "DELETE",
});
Using S3Client
When you import Bun.s3, it returns a default client that is configured using well-known environment variables, such as AWS_ACCESS_KEY_ID and AWS_SECRET_ACCESS_KEY.
import { s3, S3Client } from "bun";
// s3 instanceof S3Client
You can also create your own S3Client, then set it as the default.
import { S3Client } from "bun";
const client = new S3Client({
accessKeyId: "my-access-key-id",
secretAccessKey: "my-secret-access-key",
region: "auto",
endpoint: "https://.r2.cloudflarestorage.com ",
bucket: "my-bucket",
});
// Sets the default client to be your custom client
Bun.s3 = client;
Just like object storage, another datastore that production applications often need is a SQL database.
Since the beginning, Bun has had a built-in SQLite client. SQLite is great for smaller applications and quick scripts, where you don’t want to worry about the hastle of setting up a production database.
In Bun 1.2, we’re expanding Bun’s support for SQL databases by introducing Bun.sql, a built-in SQL client with Postgres support. We also have a pull request to add MySQL support very soon.
Using Bun.sql
You can use Bun.sql to run SQL queries using tagged-template literals. This allows you to pass JavaScript values as parameters to your SQL queries.
Most importantly, it escapes strings and uses prepared statements for you to prevent SQL injection.
import { sql } from "bun";

const users = [
  { name: "Alice", age: 25 },
  { name: "Bob", age: 65 },
];

await sql`
  INSERT INTO users (name, age)
  VALUES ${sql(users)}
`;
Reading rows is just as easy. Results are returned as an array of objects, with the column name as the key.
import { sql } from "bun";

const seniorAge = 65;
const seniorUsers = await sql`
  SELECT name, age FROM users
  WHERE age >= ${seniorAge}
`;

console.log(seniorUsers); // [{ name: "Bob", age: 65 }]
50% faster than other clients
Bun.sql is written in native code with optimizations like:
- Automatic prepared statements
- Query pipelining
- Binary wire protocol support
- Connection pooling
- Structure caching
Optimizations stack like buffs in World of Warcraft.
The result is that Bun.sql is up to 50% faster at reading rows than using the most popular Postgres clients with Node.js.
Migrate from postgres.js to Bun.sql
The Bun.sql APIs are inspired by the popular postgres.js package. This makes it easy to migrate your existing code to using Bun’s built-in SQL client.
  import { postgres } from "postgres";
  import { postgres } from "bun";

const sql = postgres({
  host: "localhost",
  port: 5432,
  database: "mydb",
  user: "...",
  password: "...",
});

const users = await sql`SELECT name, age FROM users LIMIT 1`;
console.log(users); // [{ name: "Alice", age: 25 }]
Bun is a npm-compatible package manager that makes it easy to install and update your node modules. You can use bun install to install dependencies, even if you’re using Node.js as a runtime.
Replace npm install with bun install
$ npm install
$ bun install
In Bun 1.2, we’ve made the biggest change yet to the package manager.
Problems with bun.lockb
Since the beginning, Bun has used a binary lockfile: bun.lockb.
Unlike other package managers that use text-based lockfiles, like JSON or YAML, a binary lockfile allowed us to make bun install almost 30x faster than npm.
However, we found that there were a lot of paper cuts when using a binary lockfile. First, you couldn’t view the contents of the lockfile on GitHub and other platforms. This sucked.
What happens if you receive a pull request from an external contributor that changes the bun.lockb file? Do you trust it? Probably not.
That’s also assuming there isn’t a merge conflict! Which for a binary lockfile, is almost impossible to resolve, aside from manually deleting the lockfiles and running bun install again.
This also made it hard for tools to read the lockfile. For example, dependency management tools like Dependabot would need an API to parse the lockfile, and we didn’t offer one.
Bun will continue to support bun.lockb for a long time. However, for all these reasons, we’ve decided to switch to a text-based lockfile as the default in Bun 1.2.
Introducing bun.lock
In Bun 1.2, we’re introducing a new, text-based lockfile: bun.lock.
You can migrate to the new lockfile by using the --save-text-lockfile flag.
bun install --save-text-lockfilebun.lock is a JSONC file, which is JSON with added support for comments and trailing commas.
bun.lock
// bun.lock
{
  "lockfileVersion": 0,
  "packages": [
    ["express@4.21.2", /* ... */, "sha512-..."],
    ["body-parser@1.20.3", /* ... */],
    /* ... and more */
  ],
  "workspaces": { /* ... */ },
}
This makes it much easier to view diffs in pull requests, and trailing commas make it much less likely to cause merge conflicts.
For new projects without a lockfile, Bun will generate a new bun.lock file.
For existing projects with a bun.lockb file, Bun will continue to support the binary lockfile, without migration to the new lockfile. We will continue to support the binary lockfile for a long time, so you can continue to use commands, like bun add and bun update, and it will update your bun.lockb file.
bun install gets 30% faster
You might think that after we migrated to a text-based lockfile, bun install would be slower. Wrong!
Most software projects get slower as more features are added, Bun is not one of those projects. We spent a lot of time tuning and optimizing Bun, so we could make bun install even faster.
That’s why in Bun 1.2, bun install is 30% faster than Bun 1.1
JSONC support in package.json
Have you ever added something to your package.json and forgot why months later? Or wanted to explain to your teammates why a dependency needs a specific version? Or have you ever had a merge conflict in a package.json file due to a comma?
Often these problems are due to the fact that package.json is a JSON file, and that means you can’t use comments or trailing commas in it.
package.json
{
  "dependencies": {
    // this would cause a syntax error
    "express": "4.21.2"
  }
}
This is a bad experience. Modern tools like TypeScript allow for comments and trailing commas in their configuration files, tsconfig.json for example, and it’s great. We also asked the community on your thoughts, and it seemed that the status-quo needed to change.
What JS ecosystem upgrade path would you prefer to permit comments in package.json?
— Rob Palmer (@robpalmer2) April 17, 2024
In Bun 1.2, you can use comments and trailing commas in your package.json. It just works.
package.json
{
  "name": "app",
  "dependencies": {
    // We need 0.30.8 because of a bug in 0.30.9
    "drizzle-orm": "0.30.8", /* <- trailing comma */
  },
}
Since there are many tools that read package.json files, we’ve added support to require() or import() these files with comments and trailing commas. You don’t need to change your code.
const pkg = require("./package.json");
const {
  default: { name },
} = await import("./package.json");
Since this isn’t widely supported in the JavaScript ecosystem, we’d advice you to use this feature “at your own risk.” However, we think this is the right direction to go: to make things easier for you.
.npmrc support
In Bun 1.2, we added support for reading npm’s config file: .npmrc.
You can use .npmrc to configure your npm registry and configure scoped packages. This is often necessary for corporate environments, where you might need to authenticate to a private registry.
.npmrc
@my-company:registry=https://packages.my-company.com
@my-org:registry=https://packages.my-company.com/my-org
Bun will look for an .npmrc file in your project’s root directory, and in your home directory.
bun run --filter
You can now use bun run --filter to run a script in multiple workspaces at the same time.
This will run the dev script, concurrently, in all workspaces that match the glob pattern. It will also interleave the output of each script, so you can see the output of each workspace as it runs.
You can also pass multiple filters to --filter, and you can just use bun instead of bun run.
bun --filter 'api/*' --filter 'frontend/*' dev
bun outdated
You can now view which dependencies are out-of-date using bun outdated.
It will show a list of your package.json dependencies, and which versions are out-of-date. The “update” column shows the next semver-matching version, and the “latest” column shows the latest version.
If you notice there’s a specific dependency you want to update, you can use bun update.
bun update @typescript-eslint/parser # Updates to "7.18.0"bun update @typescript-eslint/parser --latest # Updates to "8.2.0"You can also filter which dependencies you want to check for updates. Just make sure to quote patterns, so your shell doesn’t expand them as glob patterns!
bun outdated "is-*" # check is-even, is-odd, etc.bun outdated "@discordjs/*" # check @discordjs/voice, @discordjs/rest, etc.bun outdated jquery --filter="foo" # check jquery in the `foo` workspacebun publish
You can now publish npm packages using bun publish.
It’s a drop-in replacement for npm publish, and supports many of the same features like:
- Reading
.npmrcfiles for authentication. - Packing tarballs, accounting for
.gitignoreand.npmignorefiles in multiple directories. - OTP / Two-factor authentication.
- Handling edgecases with package.json fields like
bin,files, etc. - Handling missing
READMEfiles carefully.
We’ve also added support for commands that are useful for publishing, like:
bun pm whoami, which prints your npm username.bun pm pack, which creates an npm package tarball for publishing or installing locally.
bun patch
Sometimes, your dependencies have bugs or missing features. While you could fork the package, make your changes, and publish it — that’s a lot of work. What if you don’t want to maintain a fork?
In Bun 1.2, we’ve added support for patching dependencies. Here’s how it works:
- Run
bun patchto patch a package. - Edit the files in the
node_modules/directory. - Run
bun patch --committo save your changes. That’s it!
Bun generates a .patch file with your changes in the patches/ directory, which is automatically applied on bun install. You can then commit the patch file to your repository, and share it with your team.
For example, you could create a patch to replace a dependency with your own code.
./patches/is-even@1.0.0.patch
diff --git a/index.js b/index.js
index 832d92223a9ec491364ee10dcbe3ad495446ab80..2a61f0dd2f476a4a30631c570e6c8d2d148d419a 100644
--- a/index.js
+++ b/index.js
@@ -1,14 +1 @@
- 'use strict';
-
- var isOdd = require('is-odd');
-
- module.exports = function isEven(i) {
-   return !isOdd(i);
- };
+ module.exports = (i) => (i % 2 === 0)
Bun clones the package from the node_modules directory with a fresh copy of itself. This allows you to safely make edits to files in the package’s directory without impacting shared file caches.
Easier to use
We’ve also made a bunch of small improvements to make bun install easier to use.
CA certificates
You can now configure CA certificates for bun install. This is useful when you need to install packages from your company’s private registry, or if you want to use self-signed certificate.
bunfig.toml
[install]
# The CA certificate as a string
ca = "-----BEGIN CERTIFICATE-----\n...\n-----END CERTIFICATE-----"

# A path to a CA certificate file. The file can contain multiple certificates.
cafile = "path/to/cafile"
If you don’t want to change your bunfig.toml file, you can also use the --ca and --cafile flags.
bun install --cafile=/path/to/cafileIf you are using an existing .npmrc file, you can also configure CA certificates there.
.npmrc
cafile=/path/to/cafile
ca="..."
bundleDependencies support
You can now use bundleDependencies in your package.json.
package.json
{
  "bundleDependencies": ["is-even"]
}
These are dependencies that you expect to already exist in your node_modules folder, and are not installed like other dependencies.
bun add respects package.json indentation
We fixed a bug where bun add would not respect the spacing and indentation in your package.json. Bun will now preserve the indentation of your package.json, no matter how wacky it is.
package.json
// an intentionally wacky package.json
{
  "dependencies": {
              "is-even": "1.0.0",
              "is-odd": "1.0.0"
  }
}
--omit=dev|optional|peer support
Bun now supports the --omit flag with bun install, which allows you to omit dev, optional, or peer dependencies.
bun install --omit=dev # omit dev dependenciesbun install --omit=optional # omit optional dependenciesbun install --omit=peer # omit peer dependenciesbun install --omit=dev --omit=optional # omit dev and optional dependenciesBun has a built-in test runner that makes it easy to write and run tests in JavaScript, TypeScript, and JSX. It supports many of the same APIs as Jest and Vitest, which includes the expect()-style APIs.
In Bun 1.2, we’ve made a lot of improvements to bun test.
JUnit support
To use bun test with CI/CD tools like Jenkins, CircleCI, and GitLab CI, you can use the --reporter option to output test results to a JUnit XML file.
bun test --reporter=junit --reporter-outfile=junit.xmljunit.xml
xml version="1.0" encoding="UTF-8"?>
<testsuites name="bun test" tests="1" assertions="1" failures="1" time="0.001">
  <testsuite name="index.test.ts" tests="1" assertions="1" failures="1" time="0.001">

  testsuite>
testsuites>
You can also enable JUnit reporting by adding the following to your bunfig.toml file.
bunfig.toml
[test.reporter]
junit = "junit.xml"
LCOV support
You can use bun test --coverage to generate a text-based coverage report of your tests.
In Bun 1.2, we added support for LCOV coverage reporting. LCOV is a standard format for code coverage reports, and is used by many tools like Codecov.
bun test --coverage --coverage-reporter=lcovBy default, this outputs a lcov.info coverage report file in the coverage directory. You can change the coverage directory with --coverage-dir.
If you want to always enable coverage reporting, you can add the following to your bunfig.toml file.
bunfig.toml
[test]
coverage = true
coverageReporter = ["lcov"]  # default ["text"]
coverageDir = "./path/to/folder"  # default "./coverage"
Inline snapshots
You can now use inline snapshots using expect().toMatchInlineSnapshot().
Unlike toMatchSnapshot(), which stores the snapshot in a separate file, toMatchInlineSnapshot() stores snapshots directly in the test file. This makes it easier see, and even change your snapshots.
First, write a test that uses toMatchInlineSnapshot().
snapshot.test.ts
import { expect, test } from "bun:test";

test("toMatchInlineSnapshot()", () => {
  expect(new Date()).toMatchInlineSnapshot();
});
Next, update the snapshot with bun test -u, which is short for --update-snapshots.
Then, voilà! Bun has updated the test file with your snapshot.
snapshot.test.ts
import { expect, test } from "bun:test";

test("toMatchInlineSnapshot()", () => {
   expect(new Date()).toMatchInlineSnapshot();
   expect(new Date()).toMatchInlineSnapshot(`2025-01-18T02:35:53.332Z`);
});
You can also use these matchers, which do a similar thing:
test.only()
You can use test.only() to run a single test, excluding all other tests. This is useful when you’re debugging a specific test, and don’t want to run the entire test suite.
import { test } from "bun:test";

test.only("test a", () => {
  /* Only run this test  */
});

test("test b", () => {
  /* Don't run this test */
});
Previously, for this to work in Bun, you had to use the --only flag.
This was annoying, you’d usually forget to do it, and test runners like Jest don’t need it! In Bun 1.2, we’ve made this “just work”, without the need for flags.
New expect() matchers
In Bun 1.2, we added a bunch of matchers to the expect() API. These are the same matchers that are implemented by Jest, Vitest, or the jest-extended library.
You can use toContainValue() and derivatives to check if an object contains a value.
const object = new Set(["bun", "node", "npm"]);

expect(object).toContainValue("bun");
expect(object).toContainValues(["bun", "node"]);
expect(object).toContainAllValues(["bun", "node", "npm"]);
expect(object).not.toContainAnyValues(["done"]);
Or, use toContainKey() and derivatives to check if an object contains a key.
const object = new Map([
  ["bun", "1.2.0"],
  ["node", "22.13.0"],
  ["npm", "9.1.2"],
]);

expect(object).toContainKey("bun");
expect(object).toContainKeys(["bun", "node"]);
expect(object).toContainAllKeys(["bun", "node", "npm"]);
expect(object).not.toContainAnyKeys(["done"]);
You can also use toHaveReturned() and derivatives to check if a mocked function has returned a value.
import { jest, test, expect } from "bun:test";

test("toHaveReturned()", () => {
  const mock = jest.fn(() => "foo");
  mock();
  expect(mock).toHaveReturned();
  mock();
  expect(mock).toHaveReturnedTimes(2);
});
Custom error messages
We’ve also added support for custom error messages using expect().
You can now pass a string as the second argument to expect(), which will be used as the error message. This is useful when you want to document what the assertion is checking.
example.test.ts
import { test, expect } from 'bun:test';

test("custom error message", () => {
  expect(0.1 + 0.2).toBe(0.3);
  expect(0.1 + 0.2, "Floating point has precision error").toBe(0.3);
});
1 | import { test, expect } from 'bun:test';
2 |
3 | test("custom error message", () => {
4 | expect(0.1 + 0.2, "Floating point has precision error").toBe(0.3);
^
error: expect(received).toBe(expected)
error: Floating point has precision error
Expected: 0.3
Received: 0.30000000000000004jest.setTimeout()
You can now use Jest’s setTimeout() API to change the default timeout for tests in the current scope or module, instead of setting the timeout for each test.
jest.setTimeout(60 * 1000); // 1 minute

test("do something that takes a long time", async () => {
  await Bun.sleep(Infinity);
});
You can also import setDefaultTimeout() from Bun’s test APIs, which does the same thing. We chose a different name to avoid confusion with the global setTimeout() function.
import { setDefaultTimeout } from "bun:test";

setDefaultTimeout(60 * 1000); // 1 minute
Bun is a JavaScript and TypeScript bundler, transpiler, and minifier that can be used to bundle code for the browser, Node.js, and other platforms.
HTML imports
In Bun 1.2, we’ve added support for HTML imports. This allows you to replace your entire frontend toolchain with a single import statement.
To get started, pass an HTML import to the static option in Bun.serve:
import homepage from "./index.html";

Bun.serve({
  static: {
    "/": homepage,
  },

  async fetch(req) {
    // ... api requests
  },
});
When you make a request to /, Bun automatically bundles the and tags in the HTML files, exposes them as static routes, and serves the result.
An index.html file like this:
DOCTYPE html>
<html>
  <head>
    <title>Hometitle>
    <link rel="stylesheet" href="./reset.css" />
    <link rel="stylesheet" href="./styles.css" />
  head>
  <body>
    <div id="root">div>
    <script type="module" src="./sentry-and-preloads.ts">script>
    <script type="module" src="./my-app.tsx">script>
  body>
html>
DOCTYPE html>
<html>
  <head>
    <title>Hometitle>
    <link rel="stylesheet" href="/index-[hash].css" />
  head>
  <body>
    <div id="root">div>
    <script type="module" src="/index-[hash].js">script>
  body>
html>
Standalone executables
You can usebun build --compile to compile your application, and Bun, into a standalone executable.
In Bun 1.2, we’ve added support for cross-compilation. This allows you to build a Windows or macOS binary on a Linux machine, and vice versa.
You can run the following command on a macOS or Linux machine, and it will compile a Windows binary.
bun build --compile --target=bun-windows-x64 app.ts [8ms] bundle 1 modules
[1485ms] compile app.exe bun-windows-x64-v1.2.0bun build --compile --windows-icon=./icon.ico --windows-hide-console app.tsBytecode caching
You can also usebun build --bytecode flag to generate a bytecode cache. This improves the startup time of applications like eslint to be 2x faster.
bun build --bytecode --compile app.ts--compile.
bun build --bytecode --outdir=dist app.ts.jsc files, which contain the bytecode cache of its respective .js file. Both files are necessary to run, as the bytecode compilation doesn’t currently compile async functions, generators, or eval.
The bytecode cache can be 8x larger than the source code, so this makes startup faster at a cost of increased disk space.
CommonJS output format
You can now set the output format to CommonJS withbun build. Previously, only ESM was supported.
bun build --format=cjs app.ts// app.ts
export default "Hello, world!";
var __defProp = Object.defineProperty;
var __getOwnPropNames = Object.getOwnPropertyNames;
var __getOwnPropDesc = Object.getOwnPropertyDescriptor;
var __hasOwnProp = Object.prototype.hasOwnProperty;
var __moduleCache = /* @__PURE__ */ new WeakMap;
var __toCommonJS = (from) => {
  var entry = __moduleCache.get(from), desc;
  if (entry)
    return entry;
  entry = __defProp({}, "__esModule", { value: true });
  if (from && typeof from === "object" || typeof from === "function")
    __getOwnPropNames(from).map((key) => !__hasOwnProp.call(entry, key) && __defProp(entry, key, {
      get: () => from[key],
      enumerable: !(desc = __getOwnPropDesc(from, key)) || desc.enumerable
    }));
  __moduleCache.set(from, entry);
  return entry;
};
var __export = (target, all) => {
  for (var name in all)
    __defProp(target, name, {
      get: all[name],
      enumerable: true,
      configurable: true,
      set: (newValue) => all[name] = () => newValue
    });
};

// app.js
var exports_site = {};
__export(exports_site, {
  default: () => site_default
});
module.exports = __toCommonJS(exports_site);
var site_default = "Hello, world!";
Better CommonJS detection
Some packages really want to trick bundlers and get the current module’s file path, do a runtime require, or check if the current module is the main module. They try all kinds of things to make it work, such as:"use strict";
if (eval("require.main") === eval("module.main")) {
// ...
}
require() and import in the same file. However, one of the challenges of supporting both is that there’s a lot of ambiguity.
Consider the following code, is it CommonJS or ESM?
There’s no way to tell. Then, how about this?
console.log(module.require("path"));
module.require() to get the path module. And this?
import path from "path";
console.log(path);
import. But, what about this?
import path from "path";
const fs = require("fs");
console.log(fs.readFileSync(path.resolve("package.json"), "utf8"));
import. If we said it was CommonJS due to the require, then the import would break the code. We want to simplify building stuff in JavaScript, so let’s just say it’s ESM and not be fussy.
Finally, what about this?
"use strict";

console.log(eval("module.require('path')"));
Plugin API
Bun has a universal plugin API for extending the bundler and the runtime. You can use plugins to interceptimport() statements, add custom loaders for extensions like .yaml, and implement frameworks for Bun.
onBeforeParse()
In Bun 1.2, we’re introducing a new lifecycle hook for plugins, onBeforeParse().
Unlike the existing lifecycle hooks that run JavaScript code, this hook must be a N-API addon, which can be implemented in a compiled language like Rust, C/C++, or Zig.
The hook is called immediately before parsing, without cloning the source code, without undergoing string conversion, and with practically zero overhead.
For example, you can create a Rust plugin that replaces all occurrences of foo with bar.
cargo add bun-native-pluginonBeforeParse() hook. These are advanced APIs, primarily designed for plugin and framework authors who want to use native code to make their plugins really fast.
use bun_native_plugin::{define_bun_plugin, OnBeforeParse, bun, Result, anyhow, BunLoader};
use napi_derive::napi;

define_bun_plugin!("foo-bar-plugin");

#[bun]
pub fn replace_foo_with_bar(handle: &mut OnBeforeParse) -> Result<()> {
  let input_source_code = handle.input_source_code()?;
  let output_source_code = input_source_code.replace("foo", "bar");

  handle.set_output_source_code(output_source_code, BunLoader::BUN_LOADER_JSX);
  Ok(())
}
import { build } from "bun";
import fooBarPlugin from "./foo-bar-plugin";

await build({
  entrypoints: ["./app.tsx"],
  plugins: [
    {
      name: "foo-bar-plugin",
      setup(build) {
        build.onBeforeParse(
          {
            namespace: "file",
            filter: "**/*.tsx",
          },
          {
            napiModule: fooBarPlugin,
            symbol: "replace_foo_with_bar",
          },
        );
      },
    },
  ],
});
Other changes
We also made a lot of other improvements tobun build and the Bun.build() APIs.
Inject environment variables
You can now inject environment variables from your system environment into your bundle.bun build --env="PUBLIC_*" app.tsx
import { build } from "bun";

await build({
  entrypoints: ["./app.tsx"],
  outdir: "./out",
  // Environment variables starting with "PUBLIC_"
  // will be injected in the build as process.env.PUBLIC_*
  env: "PUBLIC_*",
});
bun build --drop
You can use --drop to remove function calls from your JavaScript bundle. For example, if you pass --drop=console, all calls to console.log() will be removed from your code.
import { build } from "bun";

await build({
  entrypoints: ["./index.tsx"],
  outdir: "./out",
  drop: ["console", "anyIdentifier.or.propertyAccess"],
});
bun build ./index.tsx --outdir ./out --drop=console --drop=anyIdentifier.or.propertyAccessBanner and footer
You can now use the banner and footer options inbun build to add content above or below the bundle.
bun build --banner "/* Banner! */" --footer "/* Footer! */" app.tsimport { build } from "bun";
await build({
entrypoints: ["./app.ts"],
outdir: "./dist",
banner: "/* Banner! */",
footer: "/* Footer! */",
});
/**
 * Banner!
 */
export default "Hello, world!";
/**
 * Footer!
 */
Bun.embeddedFiles()
You can use the new Bun.embeddedFiles() API to see a list of all embedded files in a standalone executable, compiled with bun build --compile.
import { embeddedFiles } from "bun";

for (const file of embeddedFiles) {
  console.log(file.name); // "logo.png"
  console.log(file.size); // 1234
  console.log(await file.bytes()); // Uint8Array(1234) [...]
}
require.main === module
Previously, using require.main === module would mark the module as CommonJS. Now, Bun rewrites this into import.meta.main, meaning you can use this pattern alongside import statements.
import * as fs from "fs";

if (typeof require !== "undefined" && require.main === module) {
  console.log("main!", fs);
}
--ignore-dce-annotations
Some JavaScript tools support special annotations that can influence behavior during dead-code elimination. For example, the @__PURE__ annotation tells bundlers that a function call is pure (regardless of whether it actually is), and that the call can be removed if it is not used.
let button = /* @__PURE__ */ React.createElement(Button, null);
--ignore-dce-annotations flag when running bun build to ignore all annotations. This should only be used if dead-code elimination breaks bundles, and fixing the annotations should be preferred to leaving this flag on.
--packages=external
You can now control if package dependencies are included in your bundle or not. If the import does not start with ., .. or /, then it is considered a package.
bun build ./index.ts --packages externalawait Bun.build({
entrypoints: ["./index.ts"],
packages: "external",
});
bun build, is support for bundling and minifying CSS.
How it works
CSS bundlers combine multiple CSS files and assets referenced using directives likeurl, @import, @font-face, into a single CSS file you can send to browsers, avoiding a waterfall of network requests.
@import "foo.css";
@import "bar.css";
.foo {
  background: red;
}
.bar {
  background: blue;
}
bun build.
You’ll see how the CSS files are combined into a single CSS file.
/** foo.css */
.foo {
  background: red;
}

/** bar.css */
.bar {
  background: blue;
}
Import .css files from JavaScript
We’ve also made it possible to import .css files in your JavaScript and TypeScript code. This will create an additional CSS entrypoint that combines all the CSS files imported from a JavaScript module graph, along with @import rules.
import "./style.css";
import MyComponent from "./MyComponent.tsx";

// ... rest of your app
MyComponent.tsx imports another CSS file, instead of adding extra .css files to the bundle, all the CSS imported per entrypoint is flattened into a single CSS file.
bun build ./index.ts --outdir=dist index.js 0.10 KB
index.css 0.10 KB
[5ms] bundle 4 modulesUsing Bun.build()
You can also bundle CSS using the programmatic Bun.build() API. This allows you to bundle both CSS and JavaScript in the same build, with the same API.
import { build } from "bun";

const results = await build({
  entrypoints: ["./index.css"],
  outdir: "./dist",
});

console.log(results);
Static routes in Bun.serve()
Bun has a built-in HTTP server that makes it easy to respond to HTTP requests using standard APIs like Request and Response. In Bun 1.2, we added support for static routes using the new static property.
To define a static route, pass the request path as the key and a Response object as the value.
import { serve } from "bun";

serve({
  static: {
    "/health-check": new Response("Ok!"),
    "/old-link": Response.redirect("/new-link", 301),
    "/api/version": Response.json(
      {
        app: require("./package.json").version,
        bun: Bun.version,
      },
      {
        headers: { "X-Powered-By": "bun" },
      },
    ),
  },
  async fetch(request) {
    return new Response("Dynamic!");
  },
});
fetch() handler. The response body, headers, and status code are cached in memory, so there’s no JavaScript allocation or garbage collection.
If you want to reload the static routes, you can use the reload() method. This is useful if you want to update the static routes on a schedule, or when a file changes.
import { serve } from "bun";

const server = serve({
  static: {
    "/": new Response("Static!"),
  },
  async fetch(request) {
    return new Response("Dynamic!");
  },
});

setInterval(() => {
  const date = new Date().toISOString();
  server.reload({
    static: {
      "/": new Response(`Static! Updated at ${date}`),
    },
  });
}, 1000);
Bun.udpSocket()
While we added support for node:dgram in Bun 1.2, we also introduced UDP socket support in Bun’s APIs. Bun.udpSocket() is a faster, modern alternative and is similar to the existing Bun.listen() API.
import { udpSocket } from "bun";

const server = await udpSocket({
  socket: {
    data(socket, data, port, addr) {
      console.log(`Received data from ${addr}:${port}:`, data.toString());
    },
  },
});

const client = await udpSocket({ port: 0 });
client.send("Hello!", server.port, "127.0.0.1");
const socket = await Bun.udpSocket({
  port: 0,
  socket: {
    drain(socket) {
      // Socket is no longer under backpressure
    },
  },
});

// Send multiple UDP datagrams with a single syscall:
// [ , ,  ][]
socket.sendMany([
  ["Hello", 12345, "127.0.0.1"],
  ["from", 12346, "127.0.0.1"],
  ["Bun 1.2", 12347, "127.0.0.1"],
]);
Bun.file()
Bun has a built-in Bun.file() API that makes it easy to read and write files. It extends the Web-standard Blob API, and makes it easier to work with files in a server environment.
In Bun 1.2, we’ve added support for even more Bun.file() APIs.
delete()
You can now delete files using the delete() method. An alias of unlink() is also supported.
import { file } from "bun";

await file("./package.json").delete();
await file("./node_modules").unlink();
stat()
You can now use the stat() method to get a file’s metadata. This returns the same Stats object as fs.stat() in Node.js.
import { file } from "bun";

const stat = await file("./package.json").stat();
console.log(stat.size); // => 1024
console.log(stat.mode); // => 33206
console.log(stat.isFile()); // => true
console.log(stat.isDirectory()); // => false
console.log(stat.ctime); // => 2025-01-21T16:00:00+00:00
Support for S3 files
With newly added built-in support for S3, you can use the sameBun.file() APIs with a S3 file.
import { s3 } from "bun";

const stat = await s3("s3://folder/my-file.txt").stat();
console.log(stat.size); // => 1024
console.log(stat.type); // => "text/plain;charset=utf-8"

await s3("s3://folder/").unlink();
Bun.color()
To support CSS with bun build, we implemented our own CSS parser in Bun 1.2. In doing this work, we decided to expose some useful APIs for working with colors.
You can use Bun.color() to parse, normalize, and convert colors into a variety of formats. It supports CSS, ANSI color codes, RGB, HSL, and more.
import { color } from "bun";

color("#ff0000", "css"); // => "red"
color("rgb(255, 0, 0)", "css"); // => "red"
color("red", "ansi"); // => "\x1b[31m"
color("#f00", "ansi-16m"); // => "\x1b[38;2;255;0;0m"
color(0xff0000, "ansi-256"); // => "\u001b[38;5;196m"
color({ r: 255, g: 0, b: 0 }, "number"); // => 16711680
color("hsl(0, 0%, 50%)", "{rgba}"); // => { r: 128, g: 128, b: 128, a: 1 }
dns.prefetch()
You can use the new dns.prefetch() API to prefetch DNS records before they are needed. This is useful if you want to pre-warm the DNS cache on startup.
import { dns } from "bun";

// ...on startup
dns.prefetch("example.com");

// ...later on
await fetch("https://example.com/");
fetch() requests. You can also use the dns.getCacheStats() API to observe the DNS cache.
import { dns } from "bun";

await fetch("https://example.com/");

console.log(dns.getCacheStats());
// {
//   cacheHitsCompleted: 0,
//   cacheHitsInflight: 0,
//   cacheMisses: 1,
//   size: 1,
//   errors: 0,
//   totalCount: 1,
// }
Helpful utilities
We also added a few random utilities to Bun’s APIs.Bun.inspect.table()
You can now use Bun.inspect.table() to format tabular data into a string. It’s similar to console.table, except it returns a string rather than printing to the console.
console.log(
  Bun.inspect.table([
    { a: 1, b: 2, c: 3 },
    { a: 4, b: 5, c: 6 },
    { a: 7, b: 8, c: 9 },
  ]),
);

// ┌───┬───┬───┬───┐
// │   │ a │ b │ c │
// ├───┼───┼───┼───┤
// │ 0 │ 1 │ 2 │ 3 │
// │ 1 │ 4 │ 5 │ 6 │
// │ 2 │ 7 │ 8 │ 9 │
// └───┴───┴───┴───┘
Bun.randomUUIDv7()
You can use Bun.randomUUIDv7() to generate a UUID v7, a monotonic UUID suitable for sorting and databases.
import { randomUUIDv7 } from "bun";

const uuid = randomUUIDv7();
// => "0192ce11-26d5-7dc3-9305-1426de888c5a"
ORM-less object mapping
When you query a SQL database, you often want to map your query results to a JavaScript object. That’s why there’s so many popular ORM (Object-Relational Mapping) packages like Prisma and TypeORM. You can now usequery.as(Class) to map query results to instances of a class. This lets you attach methods, getters, and setters without using an ORM.
import { Database } from "bun:sqlite";

class Tweet {
  id: number;
  text: string;
  username: string;

  get isMe() {
    return this.username === "jarredsumner";
  }
}

const db = new Database("tweets.db");
const tweets = db.query("SELECT * FROM tweets").as(Tweet);

for (const tweet of tweets.all()) {
  if (!tweet.isMe) {
    console.log(`${tweet.username}: ${tweet.text}`);
  }
}
Object.create() to create a new object with the class’s prototype and assigns the values of the row to it.
It’s also important to note that this is not an ORM. It doesn’t manage relationships, generate SQL queries, or anything like that. However, it does remove a lot of boilerplate to get JavaScript objects from SQLite!
Iterable queries
You can now usequery.iterate() to get an iterator that yields rows as they are returned from the database. This is useful when you want to process rows at a time, without loading them all into memory.
import { Database } from "bun:sqlite";

class User {
  id: number;
  email: string;
}

const db = new Database("users.db");
const rows = db.query("SELECT * FROM users").as(User).iterate();

for (const row of rows) {
  console.log(row);
}
for loop, without calling iterate().
for (const row of db.query("SELECT * FROM users")) {
  console.log(row); // { id: 1, email: "hello@bun.sh" }
}
Strict query parameters
You can now omit the$, @, or : prefix when passing JavaScript values as query parameters.
import { Database } from "bun:sqlite";

const db = new Database(":memory:", {
  strict: false,
  strict: true,
});

const query = db.query(`select $message;`);

query.all({
  $message: "Hello world"
  message: "Hello world"
});strict option. This will allow you to omit the $, @, or : prefixes, and will throw an error if a parameter is missing.
Tracking changed rows
You can now access the number of rows changed and the last inserted row ID when running queries.import { Database } from "bun:sqlite";
const db = new Database(":memory:");
db.run(`CREATE TABLE users (id INTEGER, username TEXT)`);
const { changes, lastInsertRowid } = db.run(
`INSERT INTO users VALUES (1, 'jarredsumner')`,
);
console.log({
changes, // => 1
lastInsertRowid, // => 1
});
BigInt support
If you want to use 64-bit integers, you can enable thesafeIntegers option. This will return integers as as a BigInt, instead of a truncated number.
import { Database } from "bun:sqlite";

const db = new Database(":memory:", { safeIntegers: true });
const query = db.query(
  `SELECT ${BigInt(Number.MAX_SAFE_INTEGER) + 1n} as maxInteger`,
);

const { maxInteger } = query.get();
console.log(maxInteger); // => 9007199254740992n
safeIntegers() method.
import { Database } from "bun:sqlite";

const db = new Database(":memory:", { strict: true });
const query = db.query("SELECT $value as value").safeIntegers(true);

const { value } = query.get({
  value: BigInt(Number.MAX_SAFE_INTEGER) + 1n,
});
console.log(value); // => 9007199254740992n
Reliable cleanup with using
With JavaScript’s using syntax, you can automatically close statements and databases when their variables go out of scope. This allows you to clean up database resources, even if there’s a thrown error. Read on for more details on Bun’s support for this new JavaScript feature.
import { Database } from "bun:sqlite";

{
  using db = new Database("file.db");
  using query = db.query("SELECT * FROM users");
  for (const row of query.all()) {
    throw new Error("Oops!"); // no try/catch block needed!
  }
}

// scope ends here, so `db` and `query` are automatically closed
#include <stdio.h>
#include <stdlib.h>

int random() {
  return rand() + 42;
}
import { cc } from "bun:ffi";

const { symbols: { random } } = cc({
  source: "./random.c",
  symbols: {
    random: {
      returns: "int",
      args: [],
    },
  },
});

console.log(random()); // 42
Why is this useful?
For advanced use-cases or where performance is really important, you sometimes need to use system libraries from JavaScript. Today, the most common way to do this is by compiling a N-API addon usingnode-gyp. You might notice if a package uses this, because it runs a postinstall script when you install it.
However, this isn’t a great experience. Your system needs a modern version of Python and a C compiler, which is usually installed using a command like apt install build-essential.
And hopefully you don’t run into a compiler or node-gyp error, which can be quite frustrating.
gyp ERR! command "/usr/bin/node" "/tmp/node-gyp@latest--bunx/node_modules/.bin/node-gyp" "configure" "build"
gyp ERR! cwd /bun/test/node_modules/bktree-fast
gyp ERR! node -v v12.22.9
gyp ERR! node-gyp -v v9.4.0
gyp ERR! Node-gyp failed to build your package.
gyp ERR! Try to update npm and/or node-gyp and if it does not help file an issue with the package author.
error: "node-gyp" exited with code 7 (SIGBUS)
How does it work?
In case you didn’t know, Bun embeds a built-in C compiler calledtinycc. Surprise!
Unlike traditional C compilers, like gcc or clang, that can take seconds to compile a simple program, tinycc compiles simple C code in milliseconds. This makes it possible for Bun to compile your C code on-demand, without a build step.
Using the bun:ffi APIs, you can compile and run C code from JavaScript. Here’s an example project that uses the N-API to return a JavaScript string from C code.
#include <node/node_api.h>

napi_value hello_napi(napi_env env) {
  napi_value result;
  napi_create_string_utf8(env, "Hello, N-API!", NAPI_AUTO_LENGTH, &result);
  return result;
}
import { cc } from "bun:ffi";
import source from "./hello-napi.c" with { type: "file" };

const hello = cc({
  source,
  symbols: {
    hello_napi: {
      args: ["napi_env"],
      returns: "napi_value",
    },
  },
});

console.log(hello());
// => "Hello, N-API!"
node-gyp, as long as you have Bun, this just works.
In Bun 1.2, we’ve introduced a new build of Bun that works on Linux distros that use the musl libc instead of glibc, like Alpine Linux. This is supported on both Linux x64 and aarch64.
You can also use the alpine version of Bun in Docker.
docker run --rm -it oven/bun:alpine bun --print 'Bun.file("/etc/alpine-release").text()'Import attributes
You can now specify an import attribute when importing a file. This is useful when you want to import a file that isn’t JavaScript code, like a JSON object or a text file.import json from "./package.json" with { type: "json" };
typeof json; // "object"
import html from "./index.html" with { type: "text" };
typeof html; // "string"
import toml from "./bunfig.toml" with { type: "toml" };
typeof toml; // "object"
import().
const { default: json } = await import("./package.json", {
  with: { type: "json" },
});
typeof json; // "object"
Resource management with using
With the newly introduced using syntax in JavaScript, you can automatically close resources when a variable goes out of scope.
Instead of defining a variable with let or const, you can now define a variable with using.
import { serve } from "bun";

{
  using server = serve({
    port: 0,
    fetch(request) {
      return new Response("Hello, world!");
    },
  });

  doStuff(server);
}

function doStuff(server) {
  // ...
}
server variable goes out of scope, even if an exception is thrown. This is useful for ensuring that resources are properly cleaned up, especially in tests.
To support this, an object’s prototype must define a [Symbol.dispose] method, or [Symbol.asyncDispose] method if it’s an async resource.
class Resource {
  [Symbol.dispose]() { /* ... */ }
}

using resource = new Resource();

class AsyncResource {
  async [Symbol.asyncDispose]() { /* ... */ }
}

await using asyncResource = new AsyncResource();
using in dozens of Bun APIs, including Bun.spawn(), Bun.serve(), Bun.connect(), Bun.listen(), and bun:sqlite.
import { spawn } from "bun";
import { test, expect } from "bun:test";

test("able to spawn a process", async () => {
  using subprocess = spawn({
    cmd: [process.execPath, "-e", "console.log('Hello, world!')"],
    stdout: "pipe",
  });

  // Even if this expectation fails, the subprocess will still be closed.
  const stdout = new Response(subprocess.stdout).text();
  await expect(stdout).resolves.toBe("Hello, world!");
});
Promise.withResolvers()
You can use Promise.withResolvers() to create a promise that resolves or rejects when you call the resolve or reject functions.
const { promise, resolve, reject } = Promise.withResolvers();
setTimeout(() => resolve(), 1000);
await promise;
new Promise(), since you don’t need to create a new scope.
const promise = new Promise((resolve, reject) => {
  setTimeout(() => resolve(), 1000);
});
await promise;
Promise.try()
You can use Promise.try() to create a promise that wraps a synchronous or asynchronous function.
const syncFn = () => 1 + 1;
const asyncFn = async (a, b) => 1 + a + b;

await Promise.try(syncFn); // => 2
await Promise.try(asyncFn, 2, 3); // => 6
await new Promise((resolve) => resolve(syncFn()));
await new Promise((resolve) => resolve(asyncFn(2, 3)));
Error.isError()
You can now check if an object is an Error instance using Error.isError().
Error.isError(new Error()); // => true
Error.isError({}); // => false
Error.isError(new (class Error {})()); // => false
Error.isError({ [Symbol.toStringTag]: "Error" }); // => false
instanceof because the prototype chain can be tampered with, and instanceof can return false-negatives when using node:vm.
import { runInNewContext } from "node:vm";
const crossRealmError = runInNewContext("new Error()");

crossRealmError instanceof Error; // => false
Error.isError(crossRealmError); // => true
Uint8Array.toBase64()
You can now encode and decode base64 strings using Uint8Array.
toBase64()converts aUint8Arrayto a base64 stringfromBase64()converts a base64 string to aUint8Array
new Uint8Array([1, 2, 3, 4, 5]).toBase64(); // "AQIDBA=="
Unit8Array.fromBase64("AQIDBA=="); // [1, 2, 3, 4, 5]
Buffer.toString("base64") in Node.js.
Uint8Array.toHex()
You can also convert Uint8Array to and from hex strings.
toHex()converts aUint8Arrayto a hex stringfromHex()converts a hex string to aUint8Array
new Uint8Array([1, 2, 3, 4, 5]).toHex(); // "0102030405"
Unit8Array.fromHex("0102030405"); // [1, 2, 3, 4, 5]
Buffer.toString("hex") in Node.js.
Iterator helpers
There are new APIs that make it easier to work with JavaScript iterators and generators.iterator.map(fn)
Returns an iterator that yields the results of the fn function applied to each value of the original iterator, similar to Array.prototype.map.
function* range(start: number, end: number): Generator<number> {
  for (let i = start; i < end; i++) {
    yield i;
  }
}

const result = range(3, 5).map((x) => x * 2);
result.next(); // { value: 6, done: false }
iterator.flatMap(fn)
Returns an iterator that yields the values of the original iterator, but flattens the results of the fn function, similar to Array.prototype.flatMap.
function* randomThoughts(): Generator<string> {
  yield "Bun is written in Zig";
  yield "Bun runs JavaScript and TypeScript";
}

const result = randomThoughts().flatMap((x) => x.split(" "));
result.next(); // { value: "Bun", done: false }
result.next(); // { value: "is", done: false }
// ...
result.next(); // { value: "TypeScript", done: false }
iterator.filter(fn)
Returns an iterator that only yields values that pass the fn predicate, similar to Array.prototype.filter.
function* range(start: number, end: number): Generator<number> {
  for (let i = start; i < end; i++) {
    yield i;
  }
}

const result = range(3, 5).filter((x) => x % 2 === 0);
result.next(); // { value: 4, done: false }
iterator.take(n)
Returns an iterator that yields the first n values of the original iterator.
function* odds(): Generator<number> {
  let i = 1;
  while (true) {
    yield i;
    i += 2;
  }
}

const result = odds().take(1);
result.next(); // { value: 1, done: false }
result.next(); // { done: true }
iterator.drop(n)
Returns an iterator that yields all values of the original iterator, except the first n values.
function* evens(): Generator<number> {
  let i = 0;
  while (true) {
    yield i;
    i += 2;
  }
}

const result = evens().drop(2);
result.next(); // { value: 4, done: false }
result.next(); // { value: 6, done: false }
iterator.reduce(fn, initialValue)
Reduces the values of an iterator with a function, similar to Array.prototype.reduce.
function* powersOfTwo(): Generator<number> {
  let i = 1;
  while (true) {
    yield i;
    i *= 2;
  }
}

const result = powersOfTwo()
  .take(5)
  .reduce((acc, x) => acc + x, 0);
console.log(result); // 15
iterator.toArray()
Returns an array that contains all the values of the original iterator. Make sure that the iterator is finite, otherwise this will cause an infinite loop.
function* range(start: number, end: number): Generator<number> {
  for (let i = start; i < end; i++) {
    yield i;
  }
}

const result = range(1, 5).toArray();
console.log(result); // [1, 2, 3, 4]
iterator.forEach(fn)
Calls the fn function on each value of the original iterator, similar to Array.prototype.forEach.
function* randomThoughts(): Generator<string> {
  yield "Bun is written in Zig";
  yield "Bun runs JavaScript and TypeScript";
}

const result = randomThoughts().forEach((x) => console.log(x));
// Bun is written in Zig
// Bun runs JavaScript and TypeScript
iterator.find(fn)
Returns the first value of the original iterator that passes the fn predicate, similar to Array.prototype.find. If no such value exists, it returns undefined.
function* range(start: number, end: number): Generator<number> {
  for (let i = start; i < end; i++) {
    yield i;
  }
}

const result = range(0, 99).find((x) => x % 100 === 0);
console.log(result); // undefined
Float16Array
There’s now support for 16-bit floating point arrays using Float16Array. While 16-bit floating point numbers are less precise than 32-bit floating point numbers, they are much more memory efficient.
const float16 = new Float16Array(3);
const float32 = new Float32Array(3);

for (let i = 0; i < 3; i++) {
  float16[i] = i + 0.123;
  float32[i] = i + 0.123;
}

console.log(float16); // Float16Array(3) [ 0, 1.123046875, 2.123046875 ]
console.log(float32); // Float32Array(3) [ 0, 1.1230000257492065, 2.122999906539917 ]
TextDecoderStream
You can now use TextDecoderStream and TextEncoderStream to encode and decode streams of data. These APIs are the streaming equivalents of TextDecoder and TextEncoder.
You can use TextDecoderStream to decode a stream of bytes into a stream of UTF-8 strings.
const response = await fetch("https://example.com");
const body = response.body.pipeThrough(new TextDecoderStream());

for await (const chunk of body) {
  console.log(chunk); // typeof chunk === "string"
}
TextEncoderStream to encode a stream of UTF-8 strings into a stream of bytes. In Bun, this is up to 30x faster than in Node.js.
const stream = new ReadableStream({
  start(controller) {
    controller.enqueue("Hello, world!");
    controller.close();
  },
});
const body = stream.pipeThrough(new TextEncoderStream());

for await (const chunk of body) {
  console.log(chunk); // chunk instanceof Uint8Array
}
TextDecoder with stream option
There is also support for the stream option in TextDecoder. This tells the decoder that chunks are part of a larger stream, and it should not throw an error if chunk is not a complete UTF-8 code point.
const decoder = new TextDecoder("utf-8");
const first = decoder.decode(new Uint8Array([226, 153]), { stream: true });
const second = decoder.decode(new Uint8Array([165]), { stream: true });

console.log(first); // ""
console.log(second); // "♥"
bytes() API
You can now use the bytes() method on streams, which returns a Uint8Array of the stream’s data.
const response = await fetch("https://example.com/");
const bytes = await response.bytes();
console.log(bytes); // Uint8Array(1256) [ 60, 33, ... ]
arrayBuffer(), then create a new Uint8Array:
const blob = new Blob(["Hello, world!"]);
const buffer = await blob.arrayBuffer();
const bytes = new Uint8Array(buffer);
bytes() method is supported by several APIs, including Response, Blob, and Bun.file().
import { file } from "bun";

const content = await file("./hello.txt").bytes();
console.log(content); // Uint8Array(1256) [ 60, 33, ... ]
Streaming fetch() uploads
You can now send a fetch() request with a streaming body. This is useful for uploading large files, or streams of data where the content length is not known ahead of time.
await fetch("https://example.com/upload", {
  method: "POST",
  body: async function* () {
    yield "Hello";
    yield " ";
    yield "world!";
  },
});
console.group()
You can now use console.group() and console.groupEnd() to create a nested log messages. Previously, these were not implemented in Bun, and it would do nothing.
console.group("begin");
console.log("indent!");
console.groupEnd();
// begin
//   indent!
URL.createObjectURL()
There is now support for URL.createObjectURL(), which creates a URL from a Blob object. These urls can then be used in APIs like fetch(), Worker, and import().
When combined with Worker, it allows for an easy way to spawn additional threads without creating a new separate URL for the worker’s script. Since worker scripts also run through Bun’s transpiler, TypeScript syntax is supported.
const code = `
  const foo: number = 123;
  postMessage({ foo } satisfies Data);
`;
const blob = new File([code], "worker.ts");
const url = URL.createObjectURL(blob);

const worker = new Worker(url);
worker.onmessage = ({ data }) => {
  console.log("Received data:", data);
};
AbortSignal.any()
You can use AbortSignal.any() to combine multiple instances of AbortSignal. If one of the child signals is aborted, the parent signal is also aborted.
const { signal: firstSignal } = new AbortController();
fetch("https://example.com/", { signal: firstSignal });

const { signal: secondSignal } = new AbortController();
fetch("https://example.com/", { signal: secondSignal });

// Cancels if either `firstSignal` or `secondSignal` is aborted
const signal = AbortSignal.any([firstSignal, secondSignal]);
await fetch("https://example.com/slow", { signal });
bun run uses the correct directory
Previously, when you ran a package.json script using bun run, the working directory of the script was the same as the current working directory of your shell.
In most cases, you don’t notice a difference, because your shell’s working directory is usually the same as the parent directory of your package.json file.
However, if you cd into a different directory, you’ll notice the difference.
This does not match what other package managers do, like npm or yarn, and more-often-than-not causes unexpected behaviour.
In Bun 1.2, the working directory of the script is now the parent directory of the package.json file, instead of the current working directory of your shell.
/path/to/project/dist
/path/to/project
Uncaught errors in bun test
Previously, bun test would not fail when there was an uncaught error or rejection between test cases.
import { test, expect } from "bun:test";

test("should have failed, but didn't", () => {
  setTimeout(() => {
    throw new Error("Oops!");
  }, 1);
});
bun test will report the failure.
# Unhandled error between tests
-------------------------------
1 | import { test, expect } from "bun:test";
2 |
3 | test("should have failed, but didn't", () => {
4 |   setTimeout(() => {
5 |     throw new Error("Oops!");
              ^
error: Oops!
      at foo.test.ts:5:11
-------------------------------
server.stop() returns a Promise
Previously, there was no way to gracefully wait for connections to close from Bun’s HTTP server.
To make this possible, we made stop() return a promise, which resolves when in-flight HTTP connections are closed.
interface Server {
   stop(): void;
   stop(): Promise<void>;
}
Bun.build() rejects when it fails
Previously, when Bun.build() would fail, it would report the error in the logs array. This was often confusing, because the promise would resolve successfully.
import { build } from "bun";

const result = await build({
  entrypoints: ["./bad.ts"],
});

console.log(result.logs[0]); // error: ModuleNotFound resolving "./bad.ts" (entry point)
Bun.build() will now reject when it fails, instead of returning errors in the logs array.
const result = build({
  entrypoints: ["./bad.ts"],
});

await result; // error: ModuleNotFound resolving "./bad.ts" (entry point)
throw: false option.
const result = await build({
  entrypoints: ["./bad.ts"],
  throw: false,
});
bun -p is an alias for bun --print
Previously, bun -p was an alias for bun --port, which was used to change the port of Bun.serve(). The alias was added before Bun supported bun --print.
To match Node.js, we’ve changed bun -p to be an alias for bun --print.
bun build --sourcemap
Previously, using bun build --sourcemap would default to inlined source maps.
bun build --sourcemap ./index.ts --outfile ./index.jsconsole.log("Hello Bun!");
//# sourceMappingURL=data:application/json;base64,...
esbuild.
In Bun 1.2, bun build --sourcemap now defaults to linked source maps.
console.log("Hello Bun!");
{
  "version": 3,
  "sources": ["index.ts"],
  // ...
}
--sourcemap=inline.
We spend a lot of time improving performance in Bun. We post almost daily updates of “In the next version of Bun” which you can follow on @bunjavascript.
Here’s a preview of some of the performance improvements we made in Bun 1.2.
node:http2 is 2x faster
In the next version of Bun node:http2 server support is implemented. For the same code: Bun v1.1.31: 128,879 req/s (2.4x faster)Node v23.0.0: 52,785 req/s pic.twitter.com/SIM0I0Td4T — Bun (@bunjavascript) October 17, 2024
node:http is 5x faster at uploading to S3
Not to be confused with Bun’s built-in S3 client, which is even 5x faster.In the next version of Bun Uploading files via @aws-sdk/client-s3 gets 5x faster pic.twitter.com/tptxegT7vh — Ciro Spaciari (@cirospaciari) August 21, 2024
path.resolve() is 30x faster
In the next version of Bun path.resolve() gets 30x faster pic.twitter.com/ukdAHtK6lT — Jarred Sumner (@jarredsumner) September 12, 2024
fetch() is 2x faster at DNS resolution
yOu cAnT mAkE fEtCh fAsTeR pic.twitter.com/Ie8a6YM8Js — Bun (@bunjavascript) May 18, 2024
bun --hot uses 2x less memory
In the next version of Bun bun –hot uses less memory after many runs left: Bun v1.1.22 (new)right: Bun v1.1.21 (old) pic.twitter.com/eDl5iqZsme — Jarred Sumner (@jarredsumner) August 1, 2024
fs.readdirSync() is 5% faster on macOS
In the next version of Bun fs.readdirSync on macOS gets 5% faster at reading small directories pic.twitter.com/iRmoRfymxa — Jarred Sumner (@jarredsumner) June 24, 2024
String.at() is 44% faster
In the next version of Bun & Safari “foo”.at(i) gets 44% faster, thanks to @__sosukesuzuki pic.twitter.com/UtkkJSp6Vb — Bun (@bunjavascript) December 12, 2024
atob() is 8x faster
For large string inputs, atob() is up to 8x faster.
In the next version of Bun atob() gets 8x faster, thanks to @lemire‘s simdutf library pic.twitter.com/5iL1zrZS5d — Bun (@bunjavascript) May 15, 2024
fetch() decompresses 30% faster
In the next version of Bun fetch() decompresses gzip’d data 30% faster, thanks to libdeflate. pic.twitter.com/obCjWo2fHv — Jarred Sumner (@jarredsumner) July 27, 2024
Buffer.from(String, "base64") is 30x faster
For large string inputs, Buffer.from(string, "base64") is up to 30x faster.
In the next version of Bun Buffer.from(str, “base64”) gets 6x – 30x faster on large input, thanks to @lemire‘s simdutf pic.twitter.com/iFgI0Vv3sQ — Jarred Sumner (@jarredsumner) June 19, 2024
JSON.parse() is up to 4x faster
For large string inputs, JSON.parse() is between 2x and 4x faster.For object inputs, it’s 6% faster.
In the next version of Bun & Safari • 6% faster JSON.parse(object)• 200% – 400% faster JSON.parse(long string) Thanks @Constellation! pic.twitter.com/uvBJUl8gOs — Bun (@bunjavascript) May 10, 2024
Bun.serve() has 2x more throughput
The fast path for request.json() and similar methods now works after accessing the request body. This makes throughput for some Bun.serve() applications up to 2x faster.
In the next version of Bun The fast path in request.json() & similar methods now works after accessing “body” New: 65,000 req/sPrev: 29,000 req/s pic.twitter.com/2EqYyCoq4G — Jarred Sumner (@jarredsumner) September 3, 2024
Error.captureStackTrace() is 9x faster
In the next version of Bun Error.captureStackTrace(err) gets 9x faster pic.twitter.com/Ej7XW8KPNk — Jarred Sumner (@jarredsumner) October 14, 2024
fs.readFile() is 10% faster
For small files, fs.readFile() is up to 10% faster.
In the next version of Bun fs.readFile gets up to 10% faster at reading small files (reminder: 1 µs == 1000ns) pic.twitter.com/3vgg8FRfMs — Jarred Sumner (@jarredsumner) November 10, 2024
console.log(String) is 50% faster
When you use console.log() with a string as an argument, it’s now 50% faster.
In the next version of Bun console.log(string) gets 50% faster, thanks to @justjs14 pic.twitter.com/DBKd1fKODe — Bun (@bunjavascript) August 13, 2024
JavaScript is faster on Windows
In Bun 1.2, we enabled the JIT on Windows. Previously, the JIT was only available on macOS and Linux.JIT, or just-in-time compilation, is a technique that compiles code at runtime, instead of ahead-of-time compilation. This makes JavaScript faster, but it’s also a lot more complex to implement. JavaScript, across the board, now runs faster on Windows. For example:9 years ago, JavaScriptCore’s FTL JIT was disabled on Windows Today, @iangrunert brought it backhttps://t.co/xY5078Zlk6 — Jarred Sumner (@jarredsumner) July 9, 2024
Object.entries()is 20% fasterArray.map()is 50% faster
Install Bun
To get started, run any of the following commands in your terminal.curl -fsSL https://bun.sh/install | bashpowershell -c "irm bun.sh/install.ps1 | iex"docker run --rm --init --ulimit memlock=-1:-1 oven/bunUpgrade Bun
If you already installed Bun, you can upgrade with the following command. We’re hiring engineers, designers, and contributors to JavaScript engines like V8, WebKit, Hermes, and SpiderMonkey to join our team in-person in San Francisco to build the future of JavaScript. You can check out our careers page or send us an email. Bun is free, open source, and MIT-licensed. We receive a lot of open source contributions from the community. So, we’d like to thank everyone who has fixed a bug or contributed a feature. We appreciate your help!