The BananaPi M71 2 aka ArmSoM-Sige73 has attractive specs for use as an efficient but capable device for small-scale server deployment. As it’s performant enough to be interesting for real-world mixed workloads with some margin, it makes sense to consider it as a KVM hypervisor. Very relevant for setting up a small private cloud (雲立て or “kumotate”). This article documents preparing such board for use as a general Linux server (using Armbian), and then setting it up as a KVM hypervisor (using QEMU and libvirtd) to run Linux virtual machines.

Some interesting use-cases:
- Web server
- DNS server
- Mail server
- Proxy / VPN gateway
- Load balancer / Reverse proxy
- Monitoring agent
- Control plane node in orchestration mesh
- Blockchain node
- etc etc
Whatever our intentions, there are some reasons we may want to run VMs on such a small machine:
- Isolation between workloads
- Better control over resource contention: Your load balancer has less chance of bringing down your database and vice versa
- Security: Less risk of information flowing between domains
- OS upgrades and reboots: Reboot into fresh kernel without taking down the whole machine
- Ease of deployment
- Allows you to rebuild (and configure) OS images centrally and deploy over the network
- Atomic upgrades
- Dynamic resource provisioning
- Networking and port assignment
- Guest-specific kernel-level routing and filtering rules: Wire up VPN and proxy chains with the usual configuration
As the RK3588 SoC is relatively recent and the board newer, it still took some effort to figure out the right pieces to get a stable configuration with Debian. RK3588 compatibility is still not fully mainlined into the Linux kernel and you need the right device-tree overlay (dtb). This is expected for this class of boards and why some people still prefer RasPis. While we want as close to vanilla upstream Debian as possible, it does not run directly on the board. Patching it ourselves is not attractive. Hence we turn to Armbian.
We will also perform a rudimentary libvirtd installation and set it up to run QEMU virtual machines from a ZFS zpool on the attached m.2 NVME storage.
Hardware notes
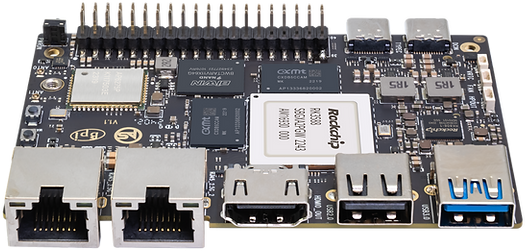
Spec summary
- 8 core RK35884 CPU (4c Cortex-A76 @2.4GHz + 4c ARM Cortex-A55 @1.8GHz)
- 8/16/32 GB DDR4 LPDDR4 RAM
- 32/64/128 GB eMMC on-board storage
- PCIe 3.0×4 PCIe m.2 port
- 2x 2.5GbE Realtek RTL8125 NICs
- USB 3.0 up to 5Gbps
- HDMI out
- Wifi 6 (BCM43752 802.11ax)
- This board is picky with NVMe drives. Drives that work fine in other computers will be especially slow, or not get detected at all (with or without associated dmesg errors). PCIe usability also varies kernel version. Some may reportedly only pick up the drive after a reboot. Keep track of known good kernel versions and drive models.
- Ensure you have sufficient power supply. A typical 5V3A will probabably not be sufficient. Failing NVMe drive may also be indicative of power issues. You can use either:
- PD 2.0
- Fixed-voltage over USB-C port (9V/2A, 12V/2A, 15V/2A)
- Watch the thermals. The performance of the RK3588 brings heat and it needs cooling under load. The same may hold for your SSD.
- Better vendor support for the kernel could be nice…
Kernel versions
It took some trial-and-error to identify a kernel which is both compatible with distribution ZFS and has working NVMe PCIe. Ubuntu noble-updates repositories have OpenZFS v2.2.2, which does not have support for Linux Kernel 6.6+. Meanwhile, Debian bookworm-backports provides v2.2.7, supporting up to 6.12. This means we will build a bookworm image.
Armbian has support for building the following kernel versions for BananaPi M7:
| Alias | Name | Version | Comment |
|---|---|---|---|
vendor 5 |
vendor-rk35xx |
6.1.75 |
NVMe unstable |
collabora 6 7 8 |
collabora-rockchip-rk3588 |
6.9.0 |
Does not even boot |
current |
current-rockchip-rk3588 |
6.12.0 |
Works |
edge |
edge-rockchip-rk3588 |
6.12.1 |
Untested |
Goals
- Locally built Armbian image for flashing to microSD card
/bootand encrypted/on microSD card- Remember that the eMMC is basically a non-replacable on-board microSD card. Consider this before you start writing heavily to it. For this excercise, we leave the on-board storage unused.
- cryptroot unlock either locally or remotely via SSH
- ZFS zpool on NVME drive for VMs and data
- Can be complemented with SATA-over-USB
In order to build a suitable custom Armbian image, we need to prepare our build environment. These notes are current as of Jan 2025. Armbian will by default attempt to build the image in a Docker container, which means you are not expected to install all further development dependencies on your build host.
Armbian build and install
This was performed on an Arch Linux amd64 host but should work on any reasonable Linux distribution.
Since the board and the host have different CPU architectures, we will have to rely on QEMU emulation without KVM.
Requirements
- BananaPi M7
- microSD card
- m.2 SSD
- USB-C PSU
- Either PD 2.0 or fixed-voltage (12v/15v/19v)
- Build host
QEMU packages installedqemu-system-aarch64andqemu-aarch64under$PATH- Git
- Docker
- Current user is member of
dockergroup
- Current user is member of
Setup build environment
Clone and fork Armbian Build Framework.
# Clone Armbian Build System
git clone https://github.com/armbian/build -b v24.11
# Make a local branch for your configuration
Build Armbian image
Issuing the following should proceed with the build inside a docker container:
NETWORKING_STACK=systemd-networkd \
CRYPTROOT_PASSPHRASE=changeme123 \
CRYPTROOT_SSH_UNLOCK=yes \
CRYPTROOT_SSH_UNLOCK_PORT=2020 \
ARTIFACT_IGNORE_CACHE=yes \
Getting errors?
Refer to the Armbian documentation.
You can iterate a bit tighter by working from a shell inside the build container:
NETWORKING_STACK=systemd-networkd \
CRYPTROOT_PASSPHRASE=changeme123 \
CRYPTROOT_SSH_UNLOCK=yes \
CRYPTROOT_SSH_UNLOCK_PORT=2020 \
ARTIFACT_IGNORE_CACHE=yes \
Flashing the image
If the build succeeded, you should find it under the output/ directory:
output/images/Armbian-unofficial_24.11.1_Bananapim7_bookworm_current_6.12.0-crypt_minimal.img
$ file output/images/Armbian-unofficial_24.11.1_Bananapim7_bookworm_current_6.12.0-crypt_minimal.img
output/images/Armbian-unofficial_24.11.1_Bananapim7_bookworm_current_6.12.0-crypt_minimal.img: DOS/MBR boot sector; partition 1 : [...]
Plug in the microSD card to your host and flash the image to it:
sudo dd of=/dev/sdxx if=output/images/Armbian-unofficial_24.11.1_Bananapim7_noble_current_6.12.0-crypt_minimal.img bs=4M status=progress && sync
First boot
Plug in monitor, keyboard, network, and the newly flashed microSD card before finally plugging in the power and letting the board turn on.
After a few seconds of both the red and green LEDs shinging, only the green LED should be active and you should see the screen turn on.
You should see a prompt for the passphrase of encrypted root partition on the monitor. If you have the Ethernet port connected to a network with DHCP, you should also be able to unlock it remotely already:
ssh -p 2020 root@192.168.1.123
You should now be prompted for the passphrase we supplied in the build command. On a subsequent first login, Armbian’s login script asks us to create a default user:
After another reboot, the growroot script will expand the root partition to fill up the remainder of the card.
Basic security
# Upgrade system packages
sudo apt-get update && sudo apt-get upgrade
# Change the default passphrase
sudo cryptsetup luksChangeKey /dev/mmcblk1p2
# Install and enable firewalld
sudo apt-get install --no-install-recommends firewalld nftables
sudo systemctl enable --now firewalld
Storage preparation
With the base OS set up (why don’t we shut down and take a backup ;)), it’s time to set up our storage pool. This is where we will store our VM images and dynamic data that we don’t want to thrash the SD card with. Even with a single drive, ZFS gives us:
- integrity guarantees through checksums – no silent corruption
- instant snapshots, clones, and rollbacks
- dynamic provisioning of volumes integrating with libvirt[^libvirt-zfs]
- better use of memory for caching (ARC)
- native encryption and compression
…at the cost of:
- some performance and IO overhead
- having to do all filesystem operations as root
- kernel modules under a non-free license
- one more thing to consider when switching kernel
- OpenZFS tends to lag behind the Linux kernel a bit – staying on LTS is recommended.
Seems worth it. Let’s look at what we have:
NAME MAJ:MIN RM SIZE RO TYPE MOUNTPOINTS
mmcblk0 179:0 0 115.3G 0 disk
mmcblk0boot0 179:32 0 4M 1 disk
mmcblk0boot1 179:64 0 4M 1 disk
mmcblk1 179:96 0 29.7G 0 disk
├─mmcblk1p1 179:97 0 256M 0 part /boot
└─mmcblk1p2 179:98 0 9G 0 part
└─armbian-root 252:0 0 9G 0 crypt /
zram0 251:0 0 15.5G 0 disk [SWAP]
nvme0n1 259:0 0 238.5G 0 disk
Looking good.
nvme drive doesn’t show?
First look if it’s mentioned at all in kernel logs:
sudo dmesg -T | grep -Ei -U1 'nvm|pci'
See notes under kernel versions.
Verify prerequisites and install packages:
# zfs module should already be available
user@janice:~$ sudo zpool list
# if module not available:
user@janice:~$ sudo modprobe zfs
user@janice:~$ sudo zpool list
if module still not available:
sudo apt-get install --no-install-recommends \
zfs-dkms zfs-zed zfsutils-linux
sudo apt-get install --no-install-recommends \
pciutils hdparm smartmontools nvme-cli
zpool creation
We should enable encryption here as well. While it’s possible to use a passphrase for the encryption of the zpool (like we do with the LUKS encryption of the root filesystem), it’s annoying and redundant to manually type multiple passphrases on each reboot. Instead, we can piggyback on the LUKS encryption by storing the encryption file for the VM zpool on the encrypted root filesystem.
caveat
Storing the encryption key directly on the root filesystem does increase exposure of the key material during runtime. This is not ideal and could be improved upon.
In lack of proper hardware keys, one could still do better by instead storing the keyfile on a separate partition which is only available for unlock and then unmounted.
Now we can go ahead and generate the key and create the zpool:
root@janice:/home/user# mkdir /root/keys
root@janice:/home/user# chmod 0700 /root/keys
root@janice:~/keys# umask 0277
root@janice:~/keys# dd if=/dev/urandom bs=32 count=1 of=/root/keys/janice1-vm1.zfskey
user@janice:~$ sudo zpool create -oashift=12 \
-Onormalization=formD -Outf8only=on -Oxattr=sa -Oacltype=posix -Ocanmount=off -Omountpoint=none \
-Oatime=off -Orelatime=off \
-Ocompression=zstd-fast \
-Oencryption=aes-256-gcm -Okeyformat=raw -Okeylocation=file:///root/keys/janice1-vm1.zfskey \
Since we only have one drive we can’t make a mirror but can get some peace of mind from copies=2. Creating the zpool creates an associated dataset (~thin volume+filesystem) which we do not mount directly. Instead we create child datasets (zfs create janice1/tank) and zvols (zfs create -V 10G janice1/tank) for actual use.
For now, we can prepare a dataset where VM images can be stored and mount it on libvirt’s default image path /var/lib/libvirt/images:
# confirm that we don't mount over anything existing
user@janice:~$ ls -la /var/lib/libvirt/images
ls: cannot access '/var/lib/libvirt/images': No such file or directory
user@janice:~$ sudo zfs create -ocanmount=on -omountpoint=/var/lib/libvirt/images janice1/vm-images
# check out the fresh dataset
user@janice1:~$ sudo zfs list
NAME USED AVAIL REFER MOUNTPOINT
janice1 400K 229G 196K none
janice1/vm-images 200K 229G 200K /var/lib/libvirt/images
user@janice1:~$ sudo zfs get mounted
NAME PROPERTY VALUE SOURCE
janice1/vm-images mounted yes -
Auto-mount encrypted zfs dataset on boot
On Debian, automating importing of zpools and mounting of datasets is handled by a set of systemd units:
user@janice1:~$ systemctl list-unit-files | grep -E '^UNIT|zfs' | sort
zfs-import-cache.service enabled enabled
zfs-import-scan.service disabled disabled
zfs-import.service masked enabled
zfs-import.target enabled enabled
zfs-load-key.service masked enabled
zfs-load-module.service enabled enabled
zfs-mount.service enabled enabled
zfs-scrub-monthly@.timer disabled enabled
zfs-scrub@.service static -
zfs-scrub-weekly@.timer disabled enabled
zfs-share.service enabled enabled
zfs.target enabled enabled
zfs-trim-monthly@.timer disabled enabled
zfs-trim@.service static -
zfs-trim-weekly@.timer disabled enabled
zfs-volumes.target enabled enabled
zfs-volume-wait.service enabled enabled
zfs-zed.service enabled enabled
After a reboot, we should have our zpool imported by zfs-import-cache.service and the dataset(s) mounted by zfs-mount.service. This typically works out of the box for unencrypted datasets. For encrypted datasets, however, zfs-load-key.service doesn’t seem to work as expected even if unmasked and enabled, meaning a manual zfs load-key -a is required before the mounting can proceed.
To rectify this and have the key automatically load at boot, we can add a simple systemd override to the zfs-import.service unit:
user@janice1:~$ sudo mkdir /etc/systemd/system/zfs-mount.service.d
user@janice1:~$ cat <<EOT | sudo tee /etc/systemd/system/zfs-mount.service.d/override.conf
ExecStart=/sbin/zfs mount -a -l
By using an override, we ensure that the change does not get undone by a future package upgrade.
Now we should see the encrypted dataset mounted after rebooting.
Hypervisor setup
Time to install libvirtd and get ready to run some VMs! As often the case, Arch wiki is a good starting reference even on Debian.
Libvirtd installation
This will install the necessary packages to run libvirtd as a hypervisor for QEMU VMs using default configuration:
sudo apt-get install --no-install-recommends \
libvirt-{daemon,daemon-system,daemon-driver-qemu,clients-qemu,login-shell,daemon-driver-storage-zfs} \
libnss-mymachines libxml2-utils \
dnsmasq dns-root-data ipset iptables python3-cap-ng \
ipxe-qemu qemu-{kvm,utils,efi-aarch64,block-extra,efi-arm}
sudo apt-get install --no-install-recommends \
dmidecode mdevctl fancontrol
sudo apt-get install --no-install-recommends \
curl htop ncdu neovim netcat-openbsd tcpdump tar tmux wget unzip xz-utils
# start libvirtd and enable on boot
sudo systemctl enable --now libvirtd
Running a VM
As a “hello world”, let’s verify that we can install and run a vanilla debian netinst image using virt-install:
user@janice:~$ sudo apt install --no-install-recommends virtinst
# start debian installation on new domain (vm) terry
user@janice:~$ virt-install --name terry \
--memory 2048 --vcpus 2 --os-variant=debian11 --graphics none \
--cdrom http://cdimage.debian.org/cdimage/release/12.9.0/arm64/iso-cd/debian-12.9.0-arm64-netinst.iso \
--disk path=/var/lib/libvirt/images/testdeb.qcow2,bus=virtio,format=qcow2,size=10

It’s alive! the pon̷y he comes
Note that user domains and root domains are in separate namespaces so make sure to be consistent if you sudo or not:
user@janice:~$ sudo virsh --all
user@janice:~$ virsh list --all
In order to completely remove the VM and wipe all storage:
virsh undefine --remove-all-storage --nvram terry
That’s all for today!
2025-01